Managing Invoices
With Hello Clever, managing invoices in Xero is simple and efficient. Follow the steps below to ensure a smooth invoicing process.
Below is a short video tutorial demonstrating how to manage invoices with Hello Clever:
Creating Invoices
You can create invoices in Xero as you normally would. Simply follow your usual process for generating invoices within the platform.
Your customers will receive an email with a Pay Now button. This button redirects them to the Hello Clever interface, where they can use a generated PayID to make payments securely and efficiently.
Checking Invoices for Payment
Once your customer makes a payment, the status of the invoice will automatically update to Paid in Xero. You can use Xero's built-in features to verify the payment status at any time.
Hello Clever will automatically deduct any applicable fees from each invoice payment made by your customers. These deductions are recorded in your Xero account for complete transparency.
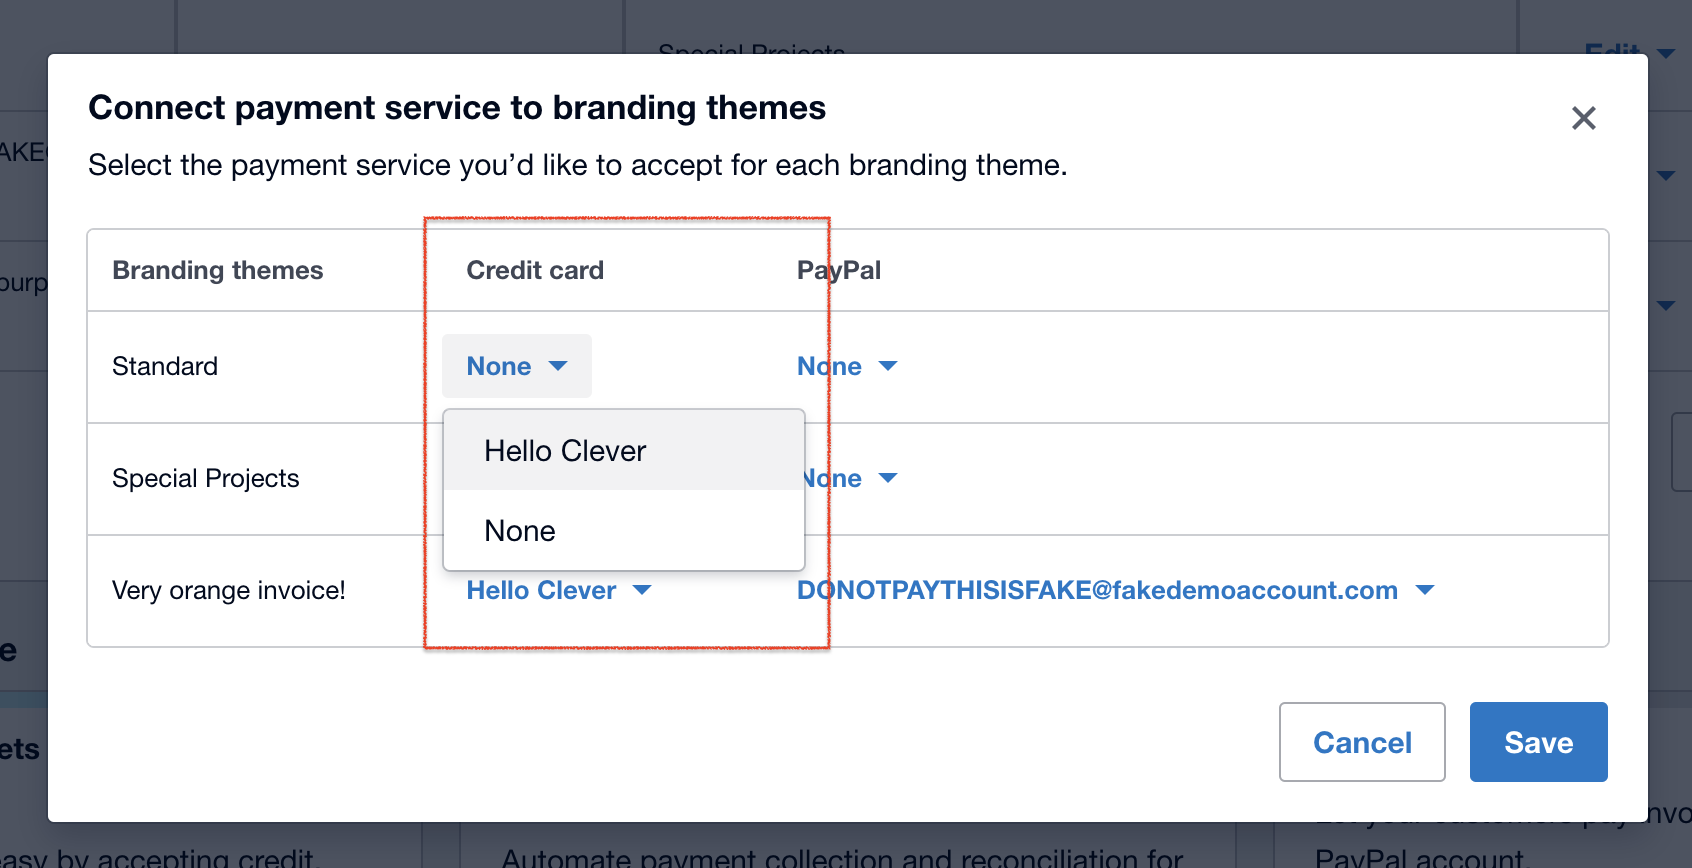
Setting Hello Clever as the Default Payment Option
You can configure Hello Clever as the default payment method in Xero by following these steps:
- Navigate to Xero Payment Services.
- Click on Manage Themes.
- In the pop-up screen labelled Connect payment service to branding themes, select the branding themes you use to send invoices to your customers.
- Under the Credit Card column, choose Hello Clever as the payment option for the selected themes.
- Click Save to confirm your changes.
By following these steps, you ensure that Hello Clever is set as the default payment option for your invoices, allowing customers to seamlessly make payments using PayID through the Hello Clever platform.