Multi-currency Gateway
Introduction
The Multi-currency Gateway APIs have been designed to simplify how merchants manage payments across different currencies and methods. All transactions are processed directly through our gateway, ensuring a seamless experience while minimising the effort required for integration.
👉 Demo: View Demo Website
Key Features
- Unified API Schema: Handle multiple currencies through a single, consistent schema.
- Multi-Currency Support: Accept and process payments in multiple currencies seamlessly.
- Currency-Aware Payment Methods: Automatically present the supported payment options based on the transaction currency.
- Fast Onboarding: Minimal setup effort with standardised API requests and responses.
Integrate Multi-currency Gateway APIs into your website
1. Payment Method
Use this API to integrate and display all payment methods directly on your website. It’s the fastest option, as you won’t need to build or manage the payment method UI yourself.
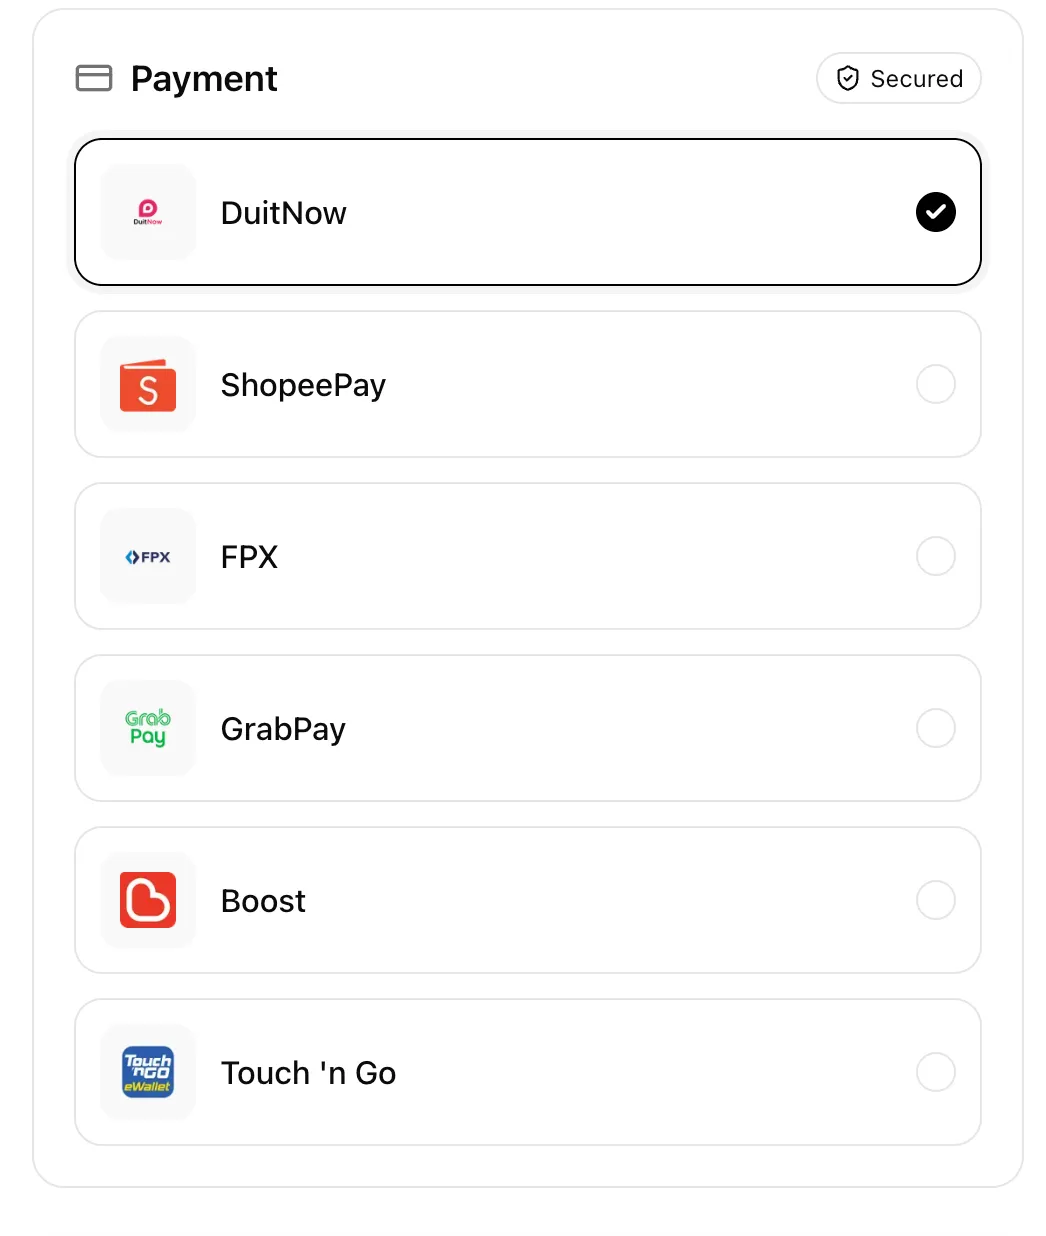
- Step 1 Call the Get PayIn Methods API to retrieve the list of available methods. (You may display this list directly in your UI.)
- Step 2 Call the Create PayIn API with the selected
payin_method_codefrom Step 1. - Step 3 The customer completes checkout on the Hello Clever hosted checkout page.
- Step 4 Wait for the webhook notification from Hello Clever and update the transaction status in your system accordingly.
2. Payment Link (Hello Clever brand)
Use this API to integrate and run your own payment gateway. Use our Payment Link API (Hello Clever branded) to start collecting payments in no time, we’ll handle the rest of the checkout experience for you.
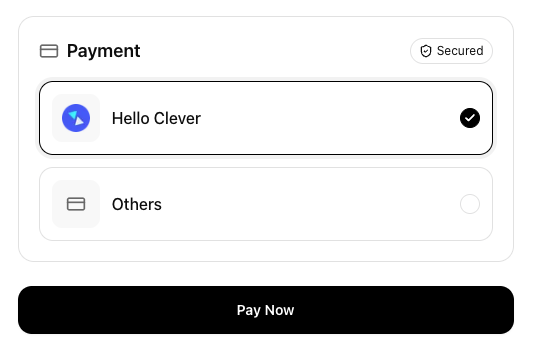
- Step 1 Call the Create PayIn API without the
payin_method_codefield. - Step 2 Redirect the customer to the generated
payment_url. - Step 3 The customer completes checkout by selecting from all available payment methods on the Hello Clever hosted checkout page.
- Step 4 Wait for the webhook notification from Hello Clever and update the transaction status in your system accordingly.
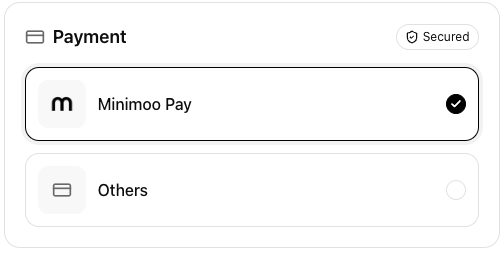
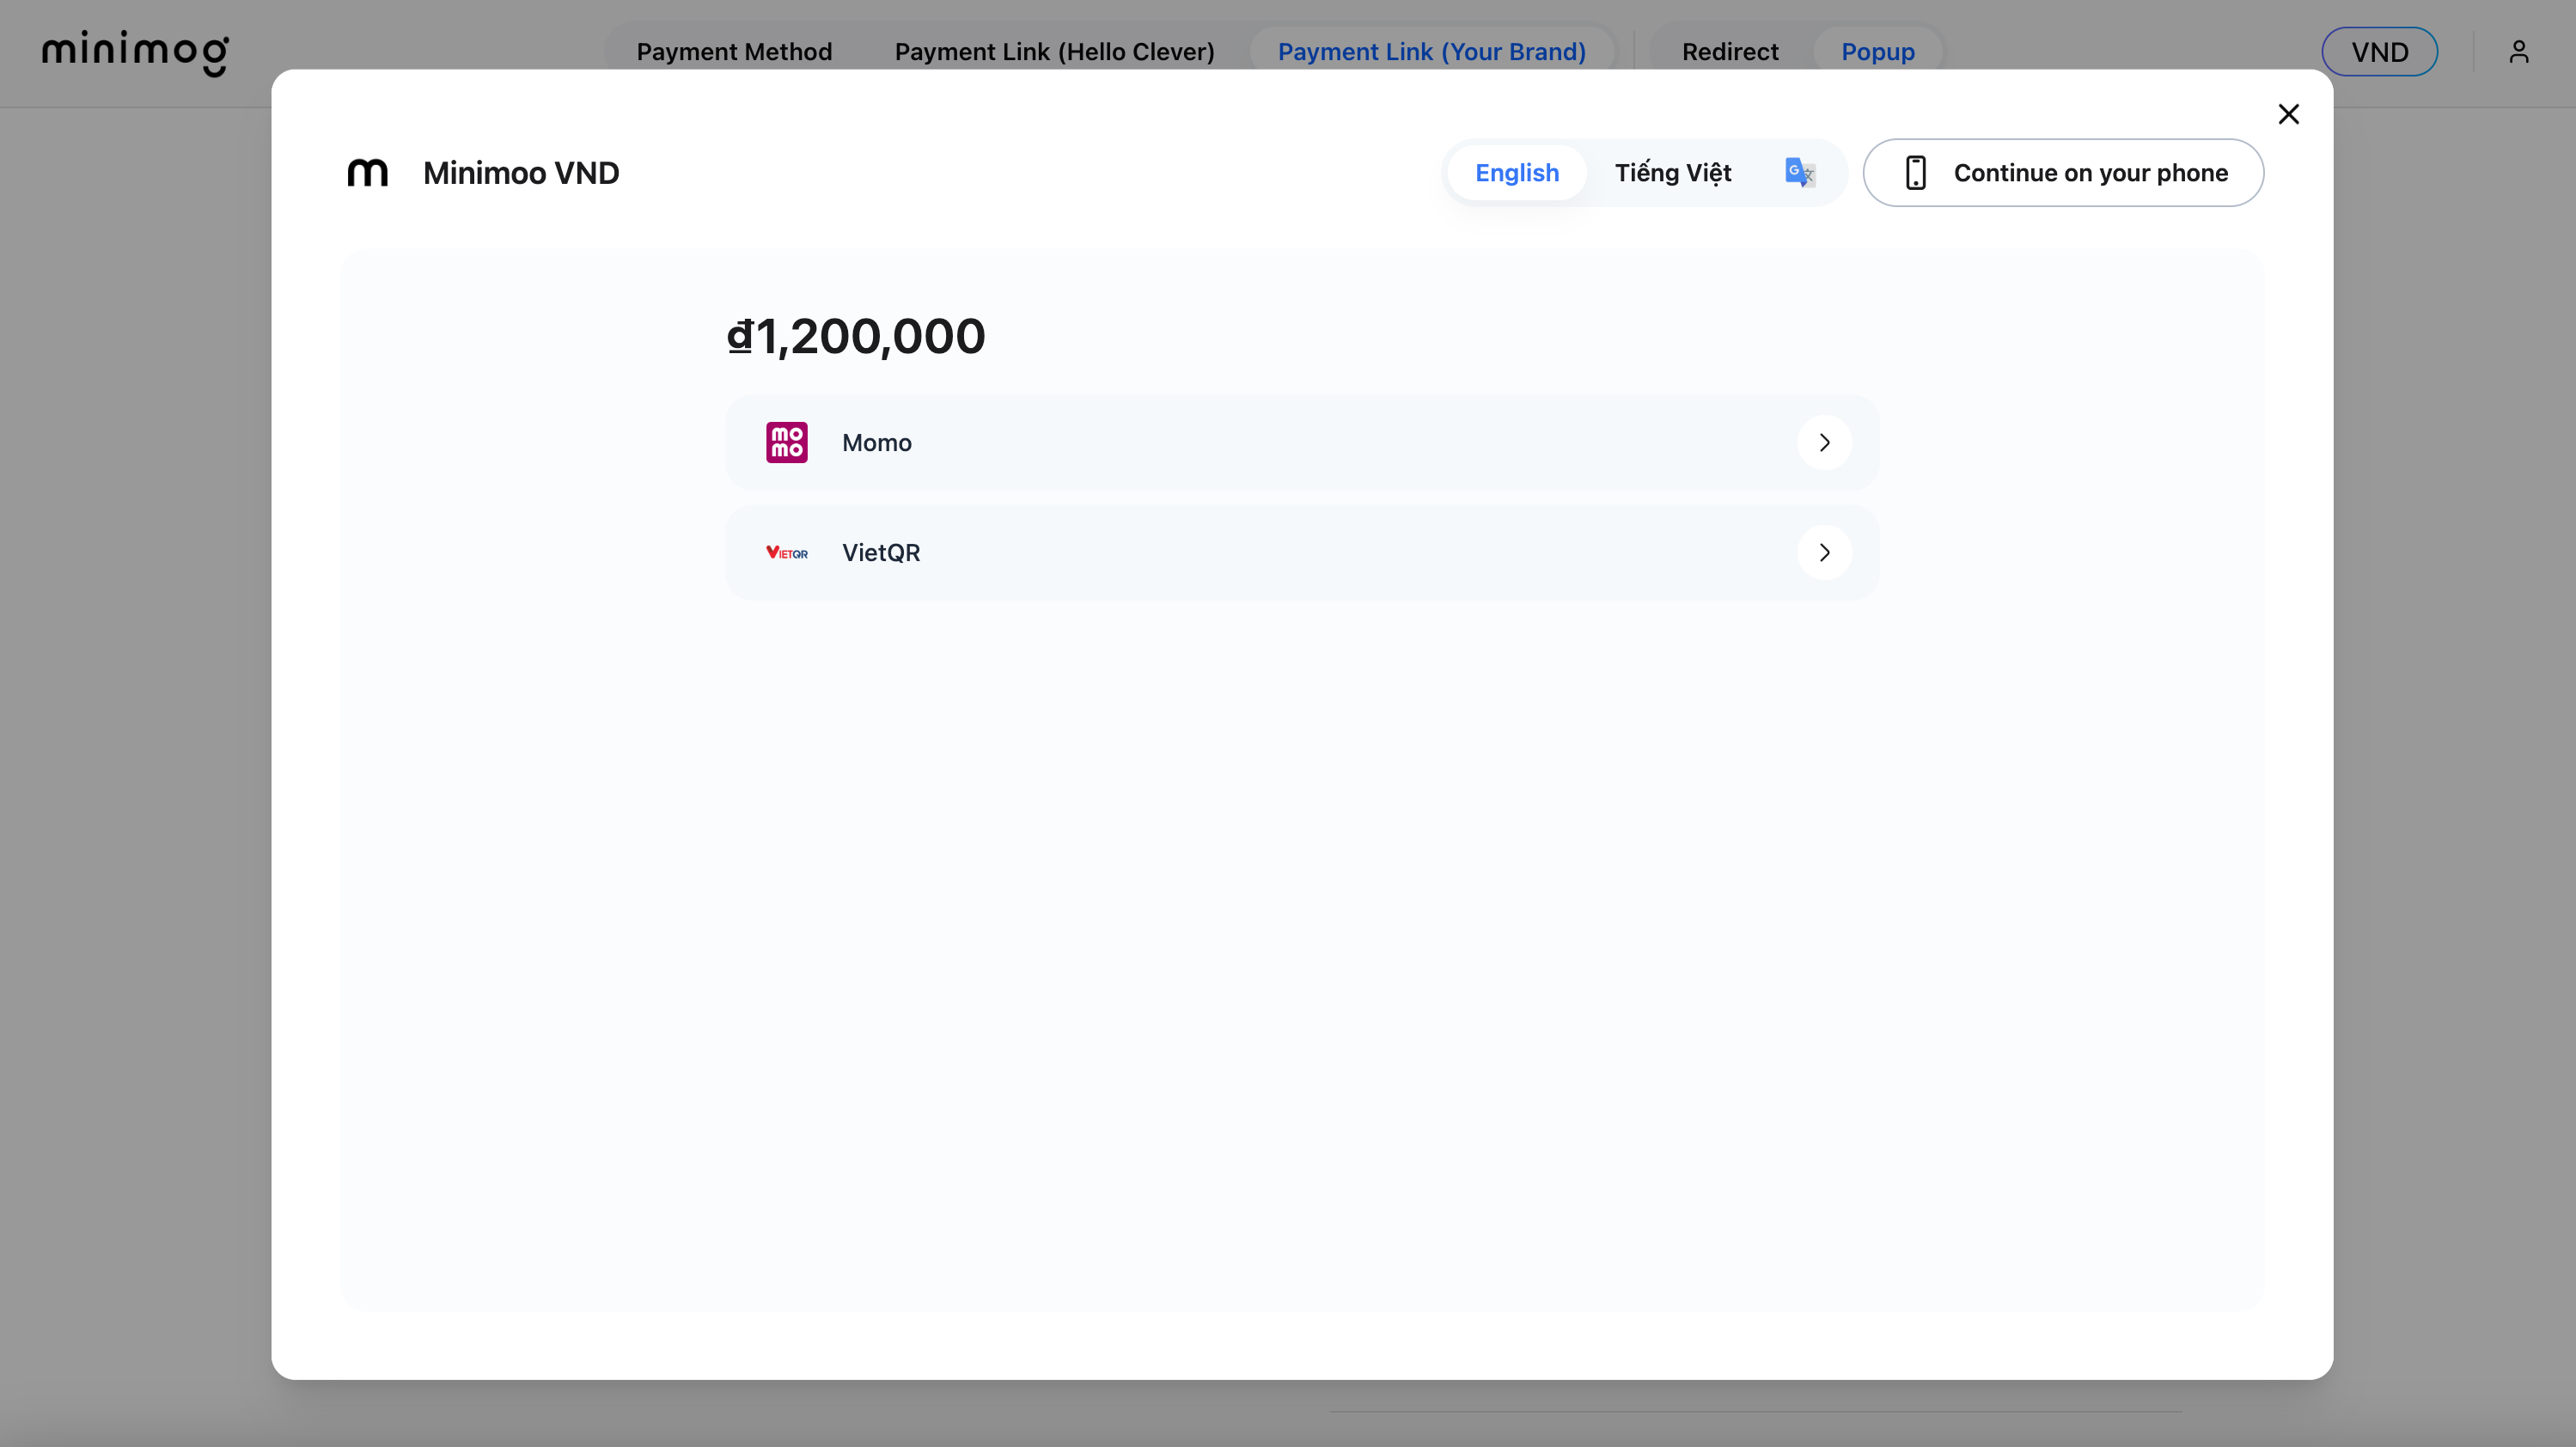
3. Payment Link (Your brand)
Please get in touch with support@helloclever.co to customise your brand
Integrate Multi-currency Gateway APIs with UX Control
1. Redirect UX
After receiving the payment_url from the Create PayIn API, redirect the user to that URL to complete the payment.
NOTE: Some browsers (such as Safari, Chrome, etc.) block redirect functionality, preventing automatic redirection to the Payment Link. You need to allow pop-ups in your browser settings here.
Example:

2. Popup UX
After receiving the payment_url from the Create PayIn API, render it inside a pop-up window so the user can complete the payment without leaving your site.
Example:
In the Popup option, you can control for handling of payment success or failure events for closing the pop-up accordingly. This guide shows you how.
Handle Payment Events in Popup UX
Listen to payment success or failure events to trigger your logic and close the pop-up when the transaction is completed.
window.addEventListener("message", function (event) {
  if (
    !event.data?.hc_payment_event ||
    typeof event.data?.hc_payment_event !== "object"
  )
    return;

  // Check the event type
  if (event.data.hc_payment_event.event_type === "onChange") {
    if (event.data.hc_payment_event.page_state === "success") {
      // Handle your logic here
      // E.g: If you want to redirect the main page to the success URL
      // window.location.href = event.data.hc_payment_event.redirect_url.success;
    }

    if (event.data.hc_payment_event.page_state === "failed") {
      // Handle your logic here
    }
  }
});
Event data object
event_type: The type of event triggered by the payment linkonChange: Triggered when the payment link state changes. This occurs when thepage_stateis success or failed page, or when the countdown reaches 0.onDone: Triggered when the Done button is clicked on the success page; or when the countdown counts to 0.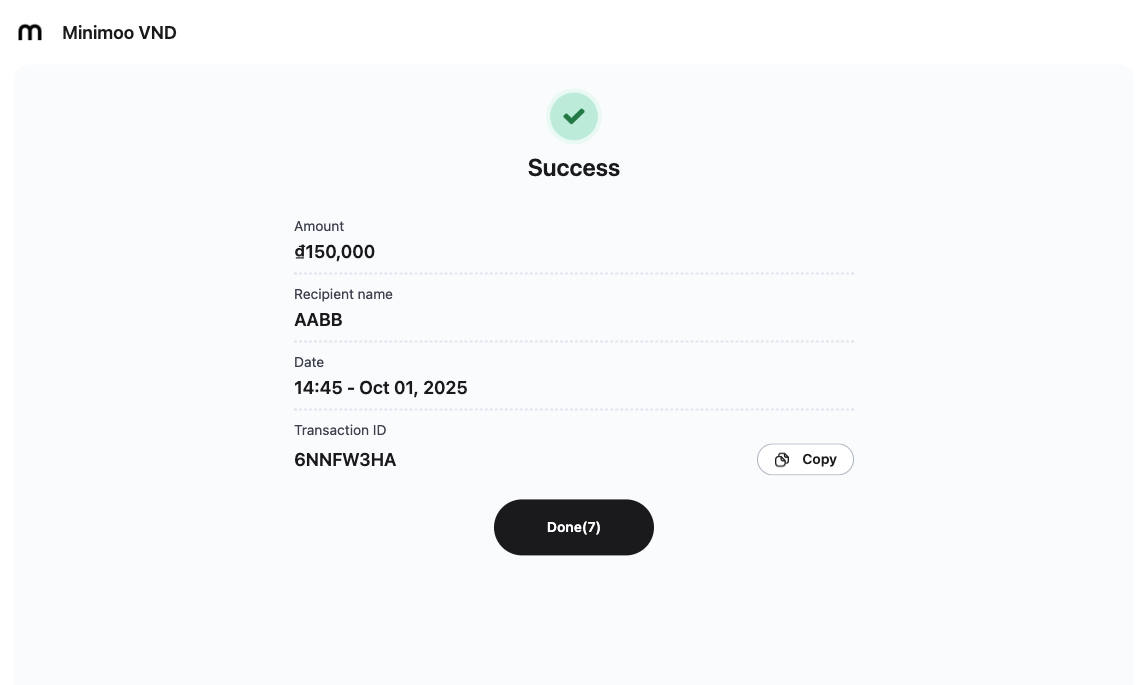
page_state: The current state of the payment linksuccess: when the payment link is on the success pagefailed: when the payment link is on the failed page
// Data format
hc_payment_event {
  event_type: string, // "onChange" || "onDone"
  page_state: "success" | "failed"
}
Example: If you want to control when the pop-up closes on successful or failed transactions.
Best Practices
- Treat webhooks as the source of truth for payment status.
- Use event listener only to improve UX (instant feedback, UI updates).
Troubleshooting
-
Some browsers (such as Safari, Chrome, etc.) block redirect functionality, preventing automatic redirection to the Payment Link. You need to allow pop-ups in your browser settings.


-
Click Tab icon
-
Open “Settings for [DOMAIN]”

-
Allow “Pop-up Window Blocked”
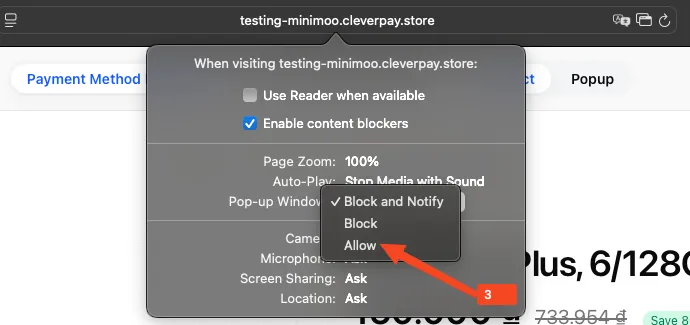
-
Authentication
- API Key: app-id
- API Key: secret-key
The app-id is registered and secured inside Hello Clever system and only required when client has initiated or in the middle of the transaction.
Security Scheme Type: | apiKey |
|---|---|
Header parameter name: | app-id |
The secret-key is our client's secret of the source. Required if a publishable key is used to retrieve the source.
Security Scheme Type: | apiKey |
|---|---|
Header parameter name: | secret-key |
Contact
Terms of Service
https://helloclever.co/terms